Two years ago, after the death of my trusty Canon DSLR camera and dredging up the fragments of old memories in dusty boxes and binders, I decided to return to film photography. A portion of this project has involved digitally archiving negatives dating back to 1996, a journey I have charted on Instagram and Pixelfed (and am very slowly developing into a web journal project). Another portion has involved using up expired film stocks in storage, familiarizing myself with local film developers, and learning how I might eventually return to darkroom printing. Toward that end, I did a bit of research and decided to tackle a relatively low-tech form of photography I have long wanted to try: pinhole photography.
In particular, I was inspired by photographer Brendon Barry‘s pandemic-era experiment using a room-size camera obscura to produce negative prints. This video beautifully illustrates the process, which goes back to the very origins of photography, using basic darkroom equipment and chemicals to create a paper negative.
My own goals were relatively more modest. I remembered once learning about a homemade pinhole camera built out of a cardboard oatmeal container. So I did some online research and found hand-built cameras made from all sorts of objects, everything from old cameras to cardboard boxes, and kits available for purchase, until finally running across instructions for the exact oatmeal-box pinhole camera I was thinking of from photographer and teacher Stewart Lewis Woodruff on this ancient website. The project is designed with kids in mind and clearly dates from the 1970s or 1980s, but the instructions are probably the most detailed I’ve found online and highly recommended if you want a full rundown of all the equipment and chemicals you’ll need. The basic idea could be easily adapted to cameras made from other objects. (Previously, I had downloaded PDF instructions on the site, but I have since not had any luck finding them; if you’re interested in a copy, feel free to reach out).
And so, following Woodruff’s instructions, my camera started with a standard-sized box of oatmeal, about 7″ high, and a lid.

After a window is carved into the canister, the interior of the box and lid is spray-painted a matte black to limit interior light as much as possible (just like a proper mechanical camera). Dust and any other stray debris is blown out of the canister to prevent anything from potentially obstructing the shot.

Below is the final camera with shutter mechanism, which is basically just a cardboard piece with a slider attached to the canister that allows you to cover or expose the pinhole underneath.

Not pictured is the actual pinhole, which is made from a small sheet of aluminum cut from a beer can that is then drilled with a tiny needle. The aluminum is sanded to a sheen to help keep the edges of the pinhole clean and, again, to prevent any potential obstructions.
The next part of the process is taking the photos and developing the prints, which ideally must be done all at once, exposing and printing one photo at a time. Woodruff’s instructions outline all the chemicals needed, but following Barry’s video, I opted for a less toxic process, using a caffenol developer and salt water fix. The idea of using materials you can pick up in any grocery store was intriguing for its accessibility and added another interesting new challenge to my project.
Unfortunately, the link to the caffenol recipe once included in Barry’s video was removed by the time I started on this project, so again, I searched the internet for another one. A site called simply caffenol, devoted to this kind of homemade developer, has this recipe for paper prints. This video from artist and curator Dr. Melanie King is also a great resource, with a couple of recipes in the description.
In all cases, caffenol is a simple solution made from instant coffee, washing soda, and vitamin C powder. My understanding is that the coffee can be replaced with any acidic liquid, including fruit juice or even chutney. The important thing is that it contains phenol, which is activated by the vitamin C. The washing soda is added to increase the overall pH. The reaction of all these components mixed together triggers photo development for prints as well as negatives.

For the fixer, I used a salt water per Brendan Barry’s recommendation. In theory, the level of sodium should act similar to the sodium compounds used in commercial photography fixer, but after some research, I learned there is some debate as to its effectiveness compared to thiosulfate. Additionally, I had some issues getting the salt to fully dissolve, which may have also impacted the quality of the fix. Ultimately, since this project was more about experimentation than results, I tried to approach these details more as important information to share and remember in the future.
Over the course of three exposure/print sessions, I produced a total of twenty-five 5″x7″, most of which I would deem failures. Much of the first session was focused on determining the proper length of exposure needed to produce an image and whether producing anything indoors was possible. I learned that capturing a still life using incandescent light with ambient natural light was not sufficient and found the best image results with 1-2 minute exposure outdoors with filtered natural light from a cloudy sky. Below are the only two successful negatives with negatives produced during this session, shown in their natural sepia color with tonal correction to improve clarity.


I attempted to produce a positive print from the clearer image to the left, but I did not have access to a good source of lighting, so I was unable to produce an image. Luckily, I have a scanner and Photoshop and was able to produce the positives below.


Clarity was improved by converting to black and white and upping the contrast.


The vignette and fish-eye effect is due to the curvature of the box, and the same effect is visible in the photos on Stewart Lewis Woodruff’s website and many other pinhole photographs. The heavy darkness is probably more due to the conditions under which I was working, i.e. a cloudy day in late afternoon, when much of my backyard is out of direct sunlight. I was also working in the winter (Christmas Day 2024, to be exact), when there is far less light available at 4-5 p.m. than most of the year.
A note here also about my darkroom equipment: For the project, I purchased three 8″x10″ Paterson plastic developing trays and tongs, in addition to Ilford black and white satin RC paper and a Bright Lab junior safe light, both purchased at the only real camera store left in the Kansas City area, now owned by Bedford Camera & Video. I have eventual plans to possibly build a darkroom in my basement, so it seemed like a good excuse to start stocking up. However, my only option right now is a small bathroom with no counters to speak of, just a bathtub. The trays went into the tub, and I blocked light from the window with a large sheet of cardboard and duct tape. Let’s just say the conditions were not optimal, and this probably also impacted quality of my prints.
As you’ll note from the negatives above, the caffenol was effective at developing an image, but the prints were also cloudy, possibly due to over-development or insufficient fix. The light in my ad hoc darkroom was meager, so it was difficult to determine when development occurred. My prints exposed indoors did not appear to develop at all (though this was likely more due to insufficient light).
However, I did learn a great deal from the mistakes I made in that first exposure/print session. For the second session a week or so later, I opted to capture images in full sunlight earlier in the day and select subjects with greater contrast. The resulting images were stronger, but as you will see from the negatives below, they were more cloudy than previous (this is likely due to reusing the caffenol from the first session).


My attempts to produce positive prints from the two higher contrast negatives above were, again, disappointing and failed to produce a clear image. I think the light I had available was just not strong enough. But I was very pleased by the results of my digital editing below.


About two weeks later, with a few sheets of the photo paper left, I decided to try producing positive prints again. Unfortunately, I don’t have any notes to consult, so I’m not certain of the exact conditions, but I was finally able to produce a very weak image. Probably with a flash light and long exposure time. Below is the print with the strongest impression.

In case you can’t see the trees in the top-center, here is the same print converted to black & white with the contrast increased.

This confirmed that achieving a positive print with the paper negatives was possible, but even a longer exposure was not sufficient to produce a clear image. In the future, I’ll try a stronger tungsten bulb.
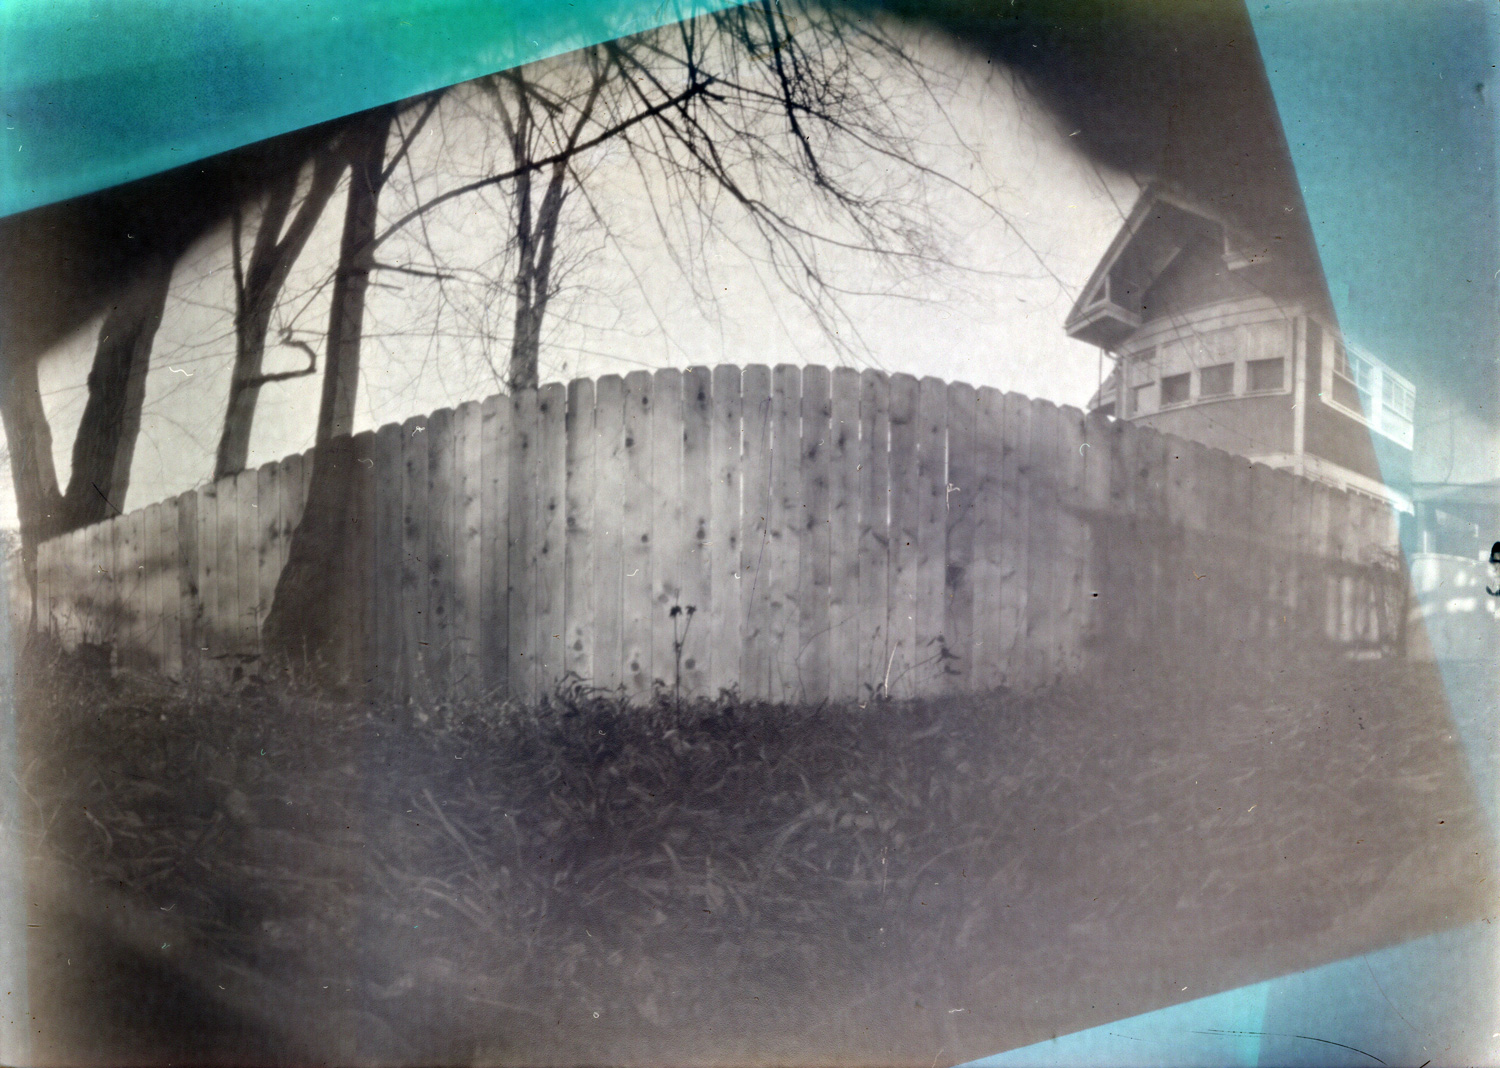
I only captured one image using the pinhole camera during this last session. It’s worth noting that while I used a fresh caffenol solution this time, I still experienced issues with cloudiness in the print. Nonetheless, I like the image and will share the whole series below, from beginning to end, so readers can get a feel for my editing process. In most cases, I preferred the color positives, which created some beautiful colors from the sepia-toned negatives.


All in all, despite all the mistakes and disappointments, I found this a rewarding project. I was able to build a simple camera and produce images with it, neither of which I was convinced I would be capable of doing beforehand. While the supplies I purchasing for printing will be useful in the future, I learned my bathroom makes an inadequate darkroom, and I will need to invest in some more/better supplies when I next attempt to produce pinhole camera prints. I did enjoy the images I was able to produce, and one of the prints was later repurposed for my entry in the 2025 KCAI Underground Mail Art Exchange.
If you’re looking for a fun “analog” photography project with limited space and equipment, I highly recommend giving this one a try. I hope that sharing my experiences has been helpful for showing what is possible and highlighting some problems to consider. Don’t be afraid to make mistakes and risk failure. I’ve found that’s often that’s where the most interesting and fruitful artistic discoveries happen.